As an Amazon Associate, we earn from qualifying purchases. Some links on this site are affiliate links at no extra cost to you. Our recommendations are based on thorough research and editorial judgment.

How to Sketch and Prototype a Custom Book Nook Before Building
To sketch and prototype a custom book nook, start by brainstorming themes—maybe a cozy café or a whimsical forest! Grab some paper, and jot down your ideas using vibrant colors, like deep forest greens or soft café browns! Use tools like Fusion 360 for 3D magic—who knew tech and art could be BFFs? Cut materials with precision, and don’t forget those fairy lights! Interested in diving deeper? There’s more creative fun ahead!
Key Takeaways
- Start by creating multiple sketches to visualize scale and design themes for your book nook.
- Utilize design software like Fusion 360 or Tinkercad for accurate 3D modeling and layout planning.
- Gather high-quality materials and test cutting settings to ensure precision during construction.
- Incorporate LED lighting into your prototype to enhance ambiance and visualize the final look.
- Document your customization ideas and progress to inspire future projects and improvements.
Understanding the Concept of Book Nooks
You may be interested


Imagine a whimsical world nestled between your favorite novels—a charming book nook, where creativity meets coziness! Book nooks, those delightful miniature dioramas, serve as the ultimate bookshelf accessory, transforming ordinary shelves into enchanting domains. Picture a moonlit forest scene glittering with tiny LED lights, or a bustling marketplace bursting with life! Each nook, often in 1:12 or 1:24 scale, invites artistic expression, encouraging you to personalize every detail—think pastel blues or vibrant reds, maybe even a tiny café table from a beloved vintage shop! They’re not just dioramas; they’re magical storytelling spaces! So, why not sprinkle some whimsy into your life? With endless themes to explore, book nooks turn your bookshelf into a gallery of imagination! Book nook kits, like those from CUTEBEE Book Nook Kits, offer various themes such as Owl Bookstore and Japanese Izakaya, allowing you to craft these enchanting scenes yourself.
Essential Supplies for Your Project

Creating a book nook begins with a shopping list of essential supplies that can transform one’s imaginative vision into reality. Grab high-quality 1/8 inch plywood or foam, and don’t forget Sculpey clay for those intricate decorative details! A reliable cutting machine—hello, Cricut Maker or Epilog Laser Cutter—is crucial for precise cuts, ensuring your miniature world comes to life flawlessly. For drafting your designs, immerse yourself in software like Fusion 360 or Tinkercad, because pencil sketches just won’t cut it anymore. Add craft knives, superglue, and paint markers to your toolkit for those finishing touches that bring your nook to life! You’re just one paint color away from a Harry Potter-worthy escape! Remember, the right supplies make all the difference! Many book nook kits also include LED lighting to create a warm ambiance, enhancing the reading space visually and atmospherically.
Recommended Products

【A Portal Into the Infinite Library】Step into the Whispering Page, a book nook inspired by Gothic stained-glass motifs and classic library architecture. Once placed on your shelf, it creates a quiet, scholarly atmosphere reminiscent of a grand reading hall.

[𝗠𝗶𝗻𝗶𝗖𝗶𝘁𝘆 𝗯𝗼𝗼𝗸 𝗻𝗼𝗼𝗸] Beyond Library Max inspired by a private library in the US, celebrates humanity's intellectual and emotional adventure of discovery, learning, and creativity by showcasing thousands of rare books, artworks, maps and artifacts both modern and ancient

[MiniCity Book Nook] Ernest Hemingway, both as a legendary figure and as a writer, created a concise, fluent, refreshing and sophisticated style of writing with his unique artistic style and superior writing skills, purifying a generation of traditional literary styles. The book nook kit stands as a tribute to Hemingway's authorship
The Importance of Sketching Your Ideas

While one might think that diving straight into construction is the way to bring their book nook to life, taking a step back to sketch ideas first is like hitting the architectural jackpot! Sketching isn’t just doodling; it’s vital for visualizing design elements and experimenting with themes! What will fit in your bookshelf space? How about a whimsical forest scene or cozy reading corner? Crafting multiple sketches helps with scale—no one wants an oversized dragon in a tiny nook, right? Plus, those well-planned sketches serve as your roadmap, guiding construction and saving time! Honestly, who enjoys redoing projects? So grab those colored pencils and get sketching—your future book nook will thank you! Let creativity flow and have fun!
Adding decorative throw pillow covers can enhance the aesthetic appeal of your book nook, providing both comfort and a touch of style.
Recommended Products

Pitt Artist Pens with brush tip can produce a line of 1 to 5mm. They offer odorless, permanent and waterproof inks in vibrant colors that will not bleed through paper. The pigmented India inks are lightfast, acid-free and pH Neutral. The pens are used daily by artists worldwide for illustrations, fashion design, life drawings, portraits, sequential art and canvas paintings. They work beautifully on all types of papers and canvas, permanent on porous surfaces. Also available individually or in as

Product name : Colleen pencil Color Pencil 120pcs set 775-120

Utilizing AI for Design Inspiration

Sketching is just the beginning of the creative adventure! Why not tap into AI to enhance your DIY Book Nook experience? Tools like DALL-E can generate stunning bookshelf diorama images—just input your wildest dreams! From whimsical fairy tales to cozy reading caves, AI offers a world of inspiration. Play around with colors—think serene seafoam greens or vibrant sunset oranges—and tweak the settings for that perfect aesthetic. Mix AI creations with your sketches, blending digital finesse and organic flair! And don’t forget, sharing your designs on AI forums can spark fresh ideas, fueling your creativity. Who doesn’t love a virtual brainstorming party? So, let AI be your co-designer—your book nook awaits, ready to impress! And if you’re seeking a personalized experience, consider book nook kits that allow for unique customization with features like LED lighting and themed designs.
Exploring Design Elements for Your Nook

A beautifully designed book nook invites exploration and creativity! To start, sketch different layouts that harmonize with your bookshelf—consider how each piece, like vibrant miniature lanterns or a textured floor, brings life and magic to your nook. Imagine the twinkling lights dancing like stars! Utilize AI tools such as Dall-E—pro tip: they help visualize intricate elements, making design decisions easier. When sizing models, remember to stick to a 1:12 scale; nothing worse than a giant tree overshadowing your tiny reading nook! Test materials like chipboard for structure or Sculpey clay for whimsical ornaments—flexibility matters! Finally, don’t forget those bookshelf inserts to add depth—your book nook deserves a touch of flair and fun! High-quality materials ensure the longevity and durability of your design, making it a worthwhile investment for your creative project. Happy designing!
Scaling Your Design: Getting the Dimensions Right
Getting the dimensions just right can make or break a book nook, especially since it has to snugly fit between those beloved volumes on the shelf! To master scaling your design, start by determining your ideal nook size, typically around 6 to 9 inches wide—easy peasy, right? Using a 1:12 scale while sketching allows each inch in your artwork to equate to a foot in real life, offering stunning detail for furniture placement. Don’t forget to measure your bookshelf first—no one wants a surprise, right? Digital tools like Tinkercad are handy for those perfect proportions! Also, consider the material thickness, like plywood, which matters when crafting your finished product. Getting dimensions right can lead to some serious book nook envy! For optimal results, consider the weight capacity of your bookshelf to ensure your nook doesn’t inadvertently cause any damage or collapse.
Recommended Products

Unleash Creativity & Stay Clutter-Free: The low loft bed gives your child endless possibilities for fun with a built-in chalkboard for writing, doodling, and learning! Plus, the rolling bookcase with 4 roomy storage cubes and smooth-gliding wheels keeps books, toys, and treasures neatly organized at all times.

[SOLID HARDWOOD] Crafted from 100% solid Parawood for heavy-duty storage.

Montessori Book Display: Double-sided portable bookshelf with 4 deep shelves for board books, activity books, and educational resources; includes removable visual countdown timer with 3 sound settings (mute, quiet, loud)
Creating a Prototype With Cardboard
Crafting a prototype with cardboard can be an absolute game changer for any book nook enthusiast! Begin by cutting tiny pieces of cardboard that mirror your original sketches, capturing every whimsical door and playful window. Use masking tape—your trusty sidekick—to assemble these pieces, letting you easily tweak and modify the design. As you create this delightful bookshelf insert, remember to test the scale by placing it on your shelf. Will it fit snugly among those beloved novels? This fun, hands-on phase highlights design flaws or areas for improvement, guiding your choice of materials for the final project. Who knew cardboard could spark so much joy in creating miniaturized fantasy worlds? Consider exploring enchanting book nooks for additional inspiration and ideas to fuel your imagination. Let your imagination run wild!
Recommended Products
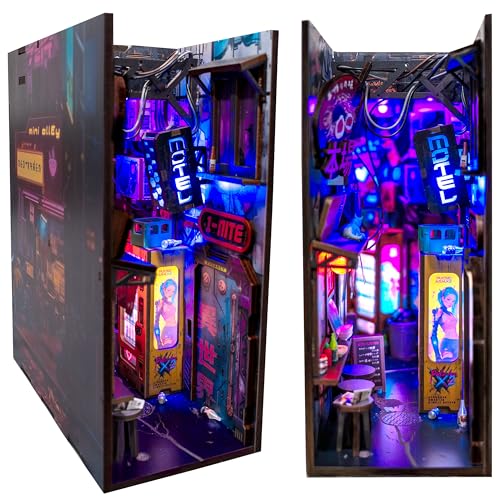
【Immersive Cyberpunk Scene】 Features a ramen shop, retro motel, yellow vending machine, and garage, all glowing under vibrant neon lights.

【 Bookstore & Coffee House Design】Build your own hidden miniature world with this vintage bookstore and cozy coffee house book nook kit. Packed with realistic mini bookstore shelves, café tables and retro street details. The warm built-in LED lights create a soft glowing night ambiance, perfect as artistic bookend and stylish decor for bookshelf, study, bedroom and living room.
♥CCCDF Book Nook Kit Beyond Library Max, inspired by a private library in the US, celebrates humanity's intellectual and emotional adventure of discovery, learning, and creativity by showcasing thousands of rare books, artworks, maps and artifacts both modern and ancient
Tips for Cutting Materials Accurately
Precision is key when cutting materials for your book nook project! Using a high-quality cutting machine, like a Cricut Maker, can make it easier to achieve effortless precision. Always set the correct material settings — for instance, Heavy Chipboard for 2 mm thick materials. Before diving into your main design, don’t forget to perform a test cut on scrap material to nail those blade depth and pressure settings. Secure your materials tightly with painter’s tape—no one wants their perfect cut to shift mid-slice! For intricate designs, opt for a fine blade and fine-tune the speed and pressure settings—because who wants tears in their creativity? Finally, keep your blades sharp and in great shape for clean cuts every time! Consider using rechargeable cabinet lights to illuminate your workspace effectively, ensuring better visibility and accuracy during the cutting process.
Recommended Products

Bundle includes an EasyPress Mini

BUNDLE INCLUDES – Cricut Maker 4, Fine-Point Blade, Light Grip Machine Mat, 2 Fine Point Pens, Tools, Materials for a practice cut, Cricut EasyPress 2 (SE), Pressing Mat, Tote Bag Blank, Smart Iron-On, Smart Vinyl, Cardstock, Transfer Tape, 30 Digital Images

CRICUT MAKER 3 & DIGITAL CONTENT BUNDLE- This Cricut Machine bundle comes with a digital library of 80 images & 12 fonts. In setting up the machine, you will be guided to register & the digital content will automatically be entitled to your account
Assembling Your Prototype for Visualization
While assembling a prototype might initially feel intimidating, it’s actually the most exhilarating part of the book nook journey! Start by gathering all those fabulous sketches and ideas—they’ll serve as your blueprint. Grab lightweight materials like cardboard or foam—easy to work with, easy to change! Use a hot glue gun like a DIY wizard, securing your pieces while ensuring they can be quickly taken apart for tweaks.
Now, let’s talk ambiance! Incorporate tiny LED lights into your design; they’ll illuminate your creation and offer a cozy glow, perfect for late-night reading. Add in some miniature furniture or quirky décor to visualize your layout. With a lively assembly process, the book nook you’ve always dreamed of starts to take shape—how exciting is that?
Don’t forget that customization options abound; many kits allow for additional miniatures and personalized touches, enabling you to deepen your connection to the story and make the nook truly your own.
Evaluating Your Design Before Finalization
Before diving into the final touches of a design, it’s absolutely essential to step back and scrutinize every delightful detail! First and foremost, make sure the proportions hit that sweet spot of 1:12 or 1:24—visual harmony is key! Over the years, several years’ worth of design wisdom shows that multiple sketches can open up fresh thematic avenues, improving functionality alongside aesthetics. Why not channel your inner tech guru and use 3D software like Fusion 360? Trust me, it’s a game-changer! Plus, don’t forget to seek feedback from fellow hobbyists—sometimes friends see what we miss! And while you’re at it, assess material choices for that perfect blend of beauty and stability. Consider including features like LED lighting that add an enchanting atmosphere to the design. Ready, set, design!
Preparing for the Building Process
As they gear up for the building process, aspiring creators should release their imaginations with a burst of enthusiasm! First, brainstorm themes inspired by beloved books or movies—just imagine your tiny book nook featuring Hogwarts or a cozy Hobbit hole! Next, sketch detailed designs with precise dimensions to guide your prototype. How will those adorable fairy lights shine? Using software like Fusion 360 or Tinkercad, craft a digital prototype—because who wants to discover their pieces won’t fit together later? Gather all necessary materials: 1/8 inch plywood, LED lights that sparkle like Tinkerbell’s pixie dust, and don’t forget those quirky decorative elements! Planning your wiring in advance guarantees everything glows perfectly—let there be light, right? Exciting times await!
Frequently Asked Questions
How to Make a DIY Reading Nook?
Creating a DIY reading nook seems simple, yet involves layers of cozy decor and strategic lighting options. Thoughtful arrangements with soft cushions, inviting colors, and whimsical touches transform an ordinary corner into a reader’s dream retreat.
What Scale Are Most Book Nooks?
Most book nooks are designed at a scale of 1:12, ensuring realistic book nook dimensions. Utilizing appropriate book nook materials and maintaining consistent scaling enhances the overall aesthetic and proportionality of the miniature setting.
Do I Need Woodworking Skills for a Book Nook?
Woodworking skills are beneficial but not mandatory for creating a book nook. Basic woodworking knowledge enhances design inspiration, while tools and kits can streamline assembly, allowing novices to craft visually appealing projects without advanced expertise.
What Tools Do I Need to Build a Book Nook?
Woodworking tools for precision and modeling supplies for creativity are essential when building a book nook. Scissors, craft knives, adhesives, and cutting machines enhance construction, while finishing tools add intricate details to the project.


